A step-by-step guide

How to Delete an Impacted CrowdStrike Driver Without Local Admin Access

In light of current IT events with CrowdStrike's update, addressing the issue quickly and effectively is paramount to getting your organization back up and running. If you’re managing systems without local admin access, the task might seem daunting. This guide simplifies the process of deleting an impacted CrowdStrike driver, ensuring your systems remain secure and compliant.

Step one

After three failed reboots, windows should start the automatic repair. Click “Advanced options.”

image
step two

Click “Troubleshoot.”

Step three

Click "Advanced Options."

image
image
step four

Click “Command Prompt.”

Step five

Gather the “Drive Label” and “key ID” from the BitLocker screen. If there is no BitLocker prompt skip to step 12.

image
step six

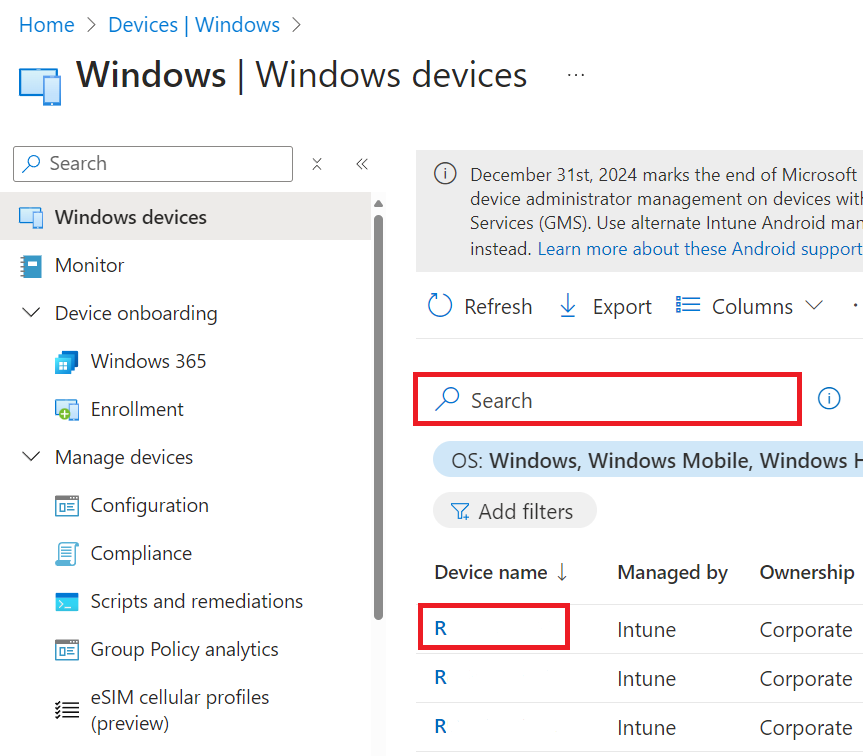
Log in to https://intune.microsoft.com as an Intune admin and click “Devices.”

Step seven

Click “Windows.”

image
step eight

Enter the computer name or the “Drive Label” gathered in step 5 in the search and then click the Device name.

Step nine

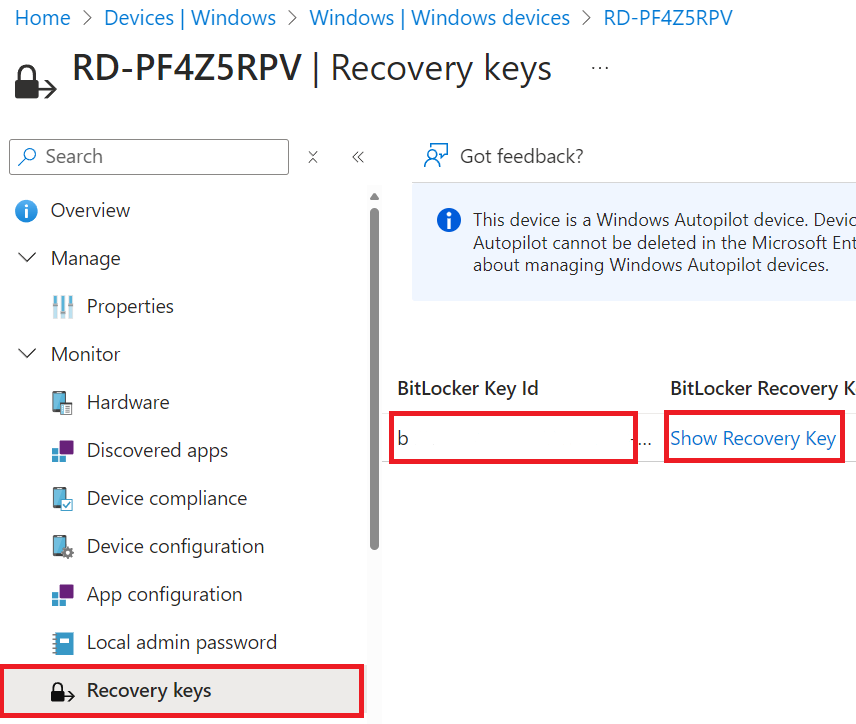
Click “Recovery keys” and then click “Show Recovery Key” next to the “key ID” gathered in step 5.

image
step ten

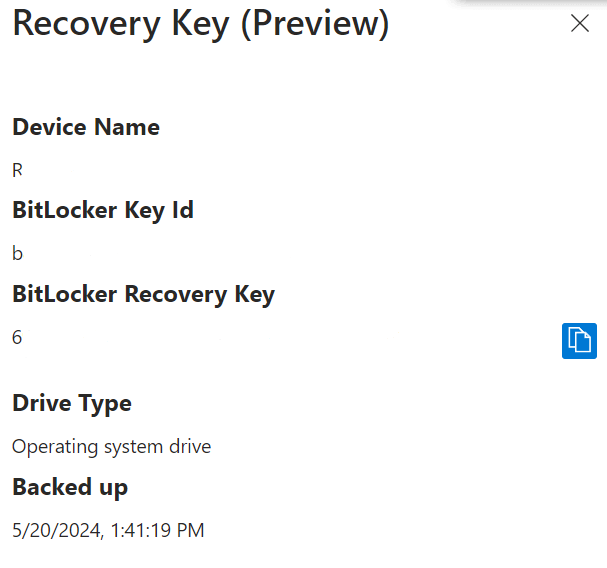
Locate the “BitLocker Recovery Key.”

Step eleven

Enter the “BitLocker Recovery Key” and click “Continue.”

image
step twelve

Type the command below and press Tab to autocomplete the file name. Then press Enter.

Type: “del C:\windows\system32\drivers\Crowdstrike\C-00000291” 

Step thirteen

After this command is run, type “exit” and restart the computer.